Setting up online payments for your business in India? Then you have already heard the name Razorpay. It is one of the most trusted payment gateways used by everyone from small Shopify stores to listed companies. But before you can collect a single rupee through it, there is one thing standing in the way: KYC verification.
KYC may sound like simple paperwork, but if you upload a wrong document or skip a step, your account stays stuck in “Under Review” for weeks. We have seen merchants lose festive season sales because of a tiny PAN-name mismatch. So here is a clear, practical guide to the Razorpay KYC process for 2026, written for business owners who just want to get done with it and start receiving payments.
What is Razorpay KYC?
KYC stands for Know Your Customer. In simple words, it is the process Razorpay uses to confirm that your business is real, registered, and run by the people you claim are running it. Since Razorpay is regulated by the Reserve Bank of India (RBI) under the Payment Aggregator Guidelines, this verification is not optional. Every business that wants to accept payments through cards, UPI, net banking, or wallets has to complete it.
In 2026, the rules have become tighter. The RBI’s revised Master Directions for Payment Aggregators (notified in late 2025) demand stricter document checks, exact name matching across PAN and bank, and ongoing Re-KYC reviews. So getting it right the first time saves you a lot of pain later.
Why Razorpay KYC is Mandatory
Razorpay holds an RBI authorisation as a Payment Aggregator (PA) along with a PCI DSS Level 1 certification. Both these come with strict compliance obligations. The platform must verify every merchant before allowing live transactions because:
- It prevents money laundering and fraud under the Prevention of Money Laundering Act (PMLA)
- It protects customers buying from your store
- It keeps Razorpay (and you) compliant with RBI rules
- It builds an audit trail that has to be maintained for at least 5 years
Skip KYC and you simply cannot go live. Try to fake details and you risk a permanent ban plus regulatory action.
Documents Required for Razorpay KYC in 2026
The exact list depends on your business type. Here is a clean breakdown:
For Sole Proprietorship
- PAN card of the proprietor
- Aadhaar / Passport / Voter ID of the proprietor
- Business proof (any one): GST certificate, Shop & Establishment licence, Udyam registration, or trade licence
- Cancelled cheque or bank statement of the business account
- Business address proof (utility bill not older than 3 months)
For Private Limited / Public Limited / OPC
- Company PAN card
- Certificate of Incorporation
- MOA and AOA
- GST registration certificate
- Board Resolution authorising the signatory (on company letterhead, signed by two directors, with company stamp)
- PAN and Aadhaar of authorised signatory
- Cancelled cheque of the company current account
For LLP / Partnership Firm
- Firm PAN card
- Partnership Deed or LLP Agreement
- LLP Incorporation Certificate (for LLPs)
- GST certificate
- PAN and Aadhaar of the authorised partner
- Cancelled cheque of the firm’s current account
For NGO / Trust / Society
- PAN of the organisation
- Trust Deed / Society Registration Certificate / Section 8 Incorporation
- 12A and 80G certificates (if applicable)
- PAN and Aadhaar of authorised signatory
- Bank account proof
- Resolution authorising the signatory
Quick tip: The name on your PAN, GST, bank account, and registration certificate must match exactly. Even small variations like “Pvt. Ltd.” vs “Private Limited” can trigger a rejection. Roughly 40% of payment gateway KYC delays in India happen because of this single issue.
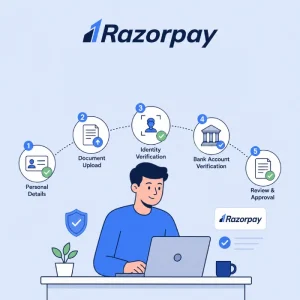
Razorpay KYC Process: Step by Step
Here is how the actual filing works on the Razorpay dashboard.
Step 1: Sign Up on Razorpay
Go to razorpay.com and create an account using your business email and phone number. Verify both through OTP. Use the email you will be using long-term for the business, since changing this later is a hassle.
Step 2: Choose Your Business Type and Category
Once inside the dashboard, you will be asked to select your business type (proprietorship, private limited, LLP, etc.) and your business category (e-commerce, education, SaaS, financial services, and so on). Pick carefully because some categories like crypto, gaming, lending, and matrimonial come with extra checks.
Step 3: Fill in Business Details
Enter your legal business name (exactly as on PAN), brand name, registered address, support email, and website URL. Make sure your website is live and includes the basic policy pages: Terms & Conditions, Privacy Policy, Refund and Cancellation Policy, Shipping Policy, and Contact Us with a physical address. Razorpay’s compliance team genuinely opens these pages and reads them.
Step 4: Add Your Business PAN
Enter your business PAN. Razorpay auto-fetches details from the income tax database using its CKYC (Central KYC Registry) integration. If the data matches, you move ahead instantly. If not, you will see a name-mismatch error here itself, which is actually useful because you catch the problem early.
Step 5: Submit Bank Account Details
Add the account number and IFSC of the bank account where your settlements should land. This must be a current account in the business’s name. (Savings accounts work only for sole proprietors.) Razorpay does a small penny-drop test to confirm the account is active and the holder name matches.
Step 6: Upload GST Details
If you are GST-registered, enter your GSTIN. If not, tick the “I do not have a GSTIN” box. Skipping GST will not reject your application, but you will lose the ability to claim input tax credit on Razorpay’s transaction fees.
Step 7: Upload Business Documents
This is where most rejections happen. Upload clear scans of every required document. Files must be:
- Under 5 MB each
- In PDF, JPG, or PNG format
- Not password protected
- Sharp and fully readable (no blurry phone photos)
Step 8: Authorised Signatory KYC
Upload PAN and address proof (Aadhaar, passport, voter ID, or driving licence) of the person authorised to act for the business. For companies, this person’s PAN must match the one mentioned on the Board Resolution.
Step 9: Submit Application
Review every field one final time. Once you click Submit KYC, you cannot edit some sections without raising a support ticket. So slow down on this last step.
Step 10: Wait for Verification
Razorpay’s review usually takes 1 to 3 working days for proprietors and 3 to 5 working days for companies and trusts. You will get email updates at every stage. The dashboard also shows the live status: In Progress, Under Review, Needs Clarification, Approved, or Rejected.
Common Reasons Razorpay KYC Gets Rejected
These are the issues we see most often when helping clients with Razorpay onboarding:
- Name mismatch between PAN, bank account, and business registration
- Address proof older than 3 months
- Blurry document scans the verification team cannot read
- Missing website pages (refund policy, contact details)
- Wrong business category chosen at the start
- Unsigned Board Resolution or one missing the company stamp
- Personal savings account submitted for a registered company
- Inactive or suspended GSTIN entered without realising
- Website not yet live or under construction
- Mismatch between authorised signatory PAN and Board Resolution
Fixing any of these means uploading new documents and waiting another 2 to 3 days. So check twice before submitting.
Razorpay Re-KYC: What You Need to Know
Razorpay also runs a periodic Re-KYC under RBI rules. The frequency depends on your business risk classification, low-risk businesses are reviewed less often, high-risk ones more often. Your account owner gets a notification on the dashboard with a deadline.
The Re-KYC process is shorter than the first KYC. You just review your details, update anything that has changed (address, signatory, bank, PAN), and submit. It usually takes 5 to 10 minutes if your documents are ready, and approval comes within 72 hours.
Ignore the deadline and Razorpay can pause your settlements. So whenever you see that yellow “Update KYC” banner, finish it the same week.
Tips to Speed Up Your Razorpay KYC Approval
A few things that genuinely make a difference:
- Match every name field precisely, including punctuation and abbreviations across PAN, bank, GST, and incorporation papers
- Use the eKYC route via Aadhaar OTP wherever possible. It is the fastest method and avoids document mismatches
- Keep all documents in one folder before starting the form, so you do not have to leave it midway
- Use a business email on your custom domain instead of Gmail. Some categories require it
- Get your website ready first with all five compliance pages live and accessible
- Choose the most accurate business category at the start. Wrong category means redoing the whole thing
- Submit during weekdays so the review starts the same day
- Keep a soft copy of your Board Resolution ready with both director signatures and company stamp
How Long Does Razorpay KYC Take?
For most Indian businesses in 2026, the typical timelines are:
- Sole proprietorship with clean documents: 1 to 2 working days
- Private limited / LLP: 3 to 5 working days
- Trusts, NGOs, and high-risk categories: 5 to 7 working days
- Re-KYC: same day to 72 hours
If you have crossed 7 days with no update, raise a ticket from your dashboard and follow up on Razorpay’s support email. Persistent follow-up moves things faster than waiting silently.
Final Thoughts
Razorpay KYC in 2026 is stricter, but more digital. Match your names across documents, keep your website compliant, and submit clean scans, the whole thing wraps up in under a week. Most rejections come from small slip-ups, not bad intent.
If you need help getting your website compliance pages, payment integration, or full e-commerce setup ready before applying for Razorpay KYC, our team at Creative Nexus handles the complete stack, from policy pages and SEO-ready websites to Razorpay integration on WordPress, WooCommerce, Shopify, and custom Laravel builds.
Frequently Asked Questions
Is Razorpay KYC free?
Yes. There is no charge for completing KYC verification. You only start paying transaction fees once you go live and process payments.
Can I start receiving payments before KYC approval?
No. You can integrate the test mode and run sandbox transactions, but live payments only begin after your KYC is approved.
Can KYC be done fully online?
Yes. Razorpay supports complete digital KYC with Aadhaar-based eKYC and document uploads. No physical paperwork is needed for most business types.
What if my Razorpay KYC gets rejected?
You will see the reason in the dashboard. Fix the highlighted issue, re-upload the corrected document, and resubmit. There is no limit on resubmissions.
Do I need GST to use Razorpay?
Not always. Many small proprietors operate without GST. But categories like B2B SaaS, marketplaces, education platforms, and high-volume retail almost always need GST registration to get approved.
Can I change my bank account after Razorpay KYC approval?
Yes, but the new account must go through a fresh penny-drop verification, and the account holder name must match your business name.
Does Razorpay accept international payments after KYC?
Yes, but international payments require an extra layer of verification. You may need to submit additional documents like a bank statement or proof of overseas business presence. Once approved, you can accept payments in over 90 currencies.
Does Razorpay verify my website content?
Yes. The compliance team checks your homepage, product pages, refund policy, terms and conditions, and contact details. Anything that looks misleading, prohibited (like crypto, MLM, or unregulated lending), or incomplete will pause your KYC.
Will I get a notification when Re-KYC is due?
Yes. Razorpay sends email and dashboard alerts well before the deadline. You will see a clear "Update KYC" banner on your dashboard with the due date. Complete it before the deadline to avoid any settlement freeze.
What is CKYC and how does it help?
CKYC (Central KYC Registry) is a government database maintained by CERSAI that stores verified KYC records of individuals and entities across financial institutions. If your details are already in CKYC, Razorpay auto-fetches them, saving you the document upload step and cutting your verification time in half.
Can a freelancer or individual use Razorpay without GST?
Yes. Freelancers and consultants can sign up as sole proprietors using just their personal PAN, Aadhaar, and a bank account. GST is needed only once your annual turnover crosses the threshold (₹20 lakh for services, ₹40 lakh for goods).
Is video KYC mandatory for Razorpay?
No, video KYC is not mandatory for most categories. Razorpay mostly relies on document upload plus Aadhaar-based eKYC. Video KYC kicks in only for high-risk merchants or when there is a flag during document verification.
What happens if my Razorpay account stays inactive after KYC approval?
Nothing serious in the short term. But under RBI rules, dormant accounts may be flagged for Re-KYC sooner. If you do not transact for over 12 months, Razorpay can pause the account until you complete fresh verification.
Can I have two Razorpay accounts for the same business?
No. RBI rules do not allow duplicate merchant accounts under the same PAN. If you need separate ledgers (say, for two brands under one company), you can use Razorpay Route or sub-merchant features instead of opening a second account.
What is the difference between Razorpay KYC and RazorpayX KYC?
Razorpay KYC activates your payment gateway for accepting customer payments. RazorpayX KYC is a separate verification for the business banking and payouts platform. If you want both products, you need to complete two separate KYC flows.
Can I edit my submitted documents during the review?
Only if Razorpay's team marks your application as "Needs Clarification". Once that happens, you can re-upload corrected documents from the dashboard. If your status is still "Under Review", you have to wait for the team to either approve or revert with a query.
Can NRIs or foreign nationals do Razorpay KYC?
Yes, but only if they are registered as a director or signatory of an Indian-registered entity. The business itself must be registered in India with a valid Indian PAN. A foreign individual cannot open a Razorpay account purely in their personal capacity.
What is the difference between KYC and AML?
KYC verifies who you are and confirms your business is genuine. AML (Anti-Money Laundering) is the ongoing monitoring that comes after KYC, checking your transaction patterns for any suspicious activity. Razorpay handles both behind the scenes.