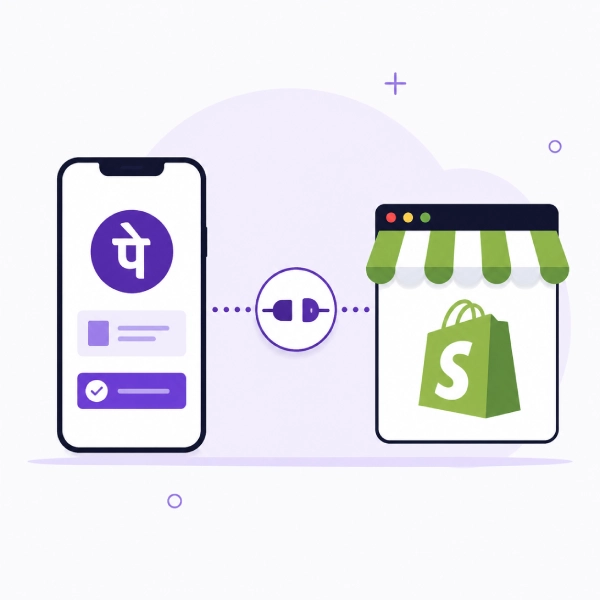
Step-by-Step Complete Guide to PhonePe Payment Integration in Shopify
PhonePe payment integration in Shopify is a no-code setup that takes under 30 minutes. You sign up for a PhonePe Business account, complete KYC, install the official PhonePe Payment Gateway plugin from inside your Shopify admin, authenticate with your merchant credentials, run a test transaction, and go live. No developer required.
If you sell to Indian customers on Shopify, PhonePe is one of the most important checkout options to enable. UPI now drives more than 80% of online payments in India, and PhonePe is the largest UPI platform in the country. Customers recognize the brand, trust the logo at checkout, and complete payments faster. Stores that add PhonePe alongside other gateways typically see a measurable lift in checkout completion. This guide walks you through every step, plus the configuration tweaks and edge cases that most generic tutorials skip.
Why PhonePe is the Right Payment Gateway for Indian Shopify Stores
Shopify Payments, the platform’s native solution, is not available in India. That leaves Shopify merchants choosing between third-party gateways, and PhonePe stands out for a few practical reasons.
It is a no-code install, so you do not need a developer or technical setup. It supports every major Indian payment method on one checkout — UPI, credit and debit cards, net banking, and wallets. It carries the PhonePe brand recognition (over 600 million users), which translates to higher checkout trust. And it offers competitive Merchant Discount Rates, especially on UPI, where charges are minimal.
PhonePe also ships specific features for Shopify stores: a half-page SDK that keeps customers on your domain during payment, dynamic routing to pick the best processing path per transaction, automatic retries on failed payments, and CVV-less card flows for repeat buyers. These add up to meaningfully better conversion compared to a basic gateway.
Prerequisites Before You Start
Get these in place before you begin:
- A registered Indian business with current account, GSTIN, and PAN
- KYC documents: business registration proof, identity proof of the authorized signatory, address proof, and a cancelled cheque or bank account details
- Admin access to your Shopify store (only Shopify admins can install payment methods)
- A live, accessible Shopify store with at least one product (you cannot test without one)
- A working business email and phone number for OTP verification
If your Shopify store is still in development mode, you will be able to install and configure PhonePe, but customers cannot actually pay until your store is on a paid Shopify plan and Online Store is published.
Step 1: Register for a PhonePe Business Account
Open the PhonePe Business website and click Get Started or Sign Up. You will be asked to enter your business name, website URL (your Shopify store domain), email, and phone number. Verify the OTP, set up a password, and you are inside the PhonePe Business onboarding flow.
Fill in the rest of the merchant profile: business type (proprietorship, partnership, LLP, private limited, and so on), industry category, monthly transaction volume estimate, and product or service description.
Be accurate about what you sell. PhonePe’s compliance team checks your store against the category you declare, and mismatches are the most common cause of activation delays. If you sell apparel, pick apparel — not “general retail.”
Step 2: Complete KYC and Get Approved
Upload your KYC documents through the PhonePe Business dashboard. You will need:
- Business registration certificate (GST certificate, partnership deed, certificate of incorporation, or shop establishment license depending on entity type)
- PAN card of the business and the authorized signatory
- Aadhaar or passport of the authorized signatory
- Cancelled cheque or bank statement of the business current account
- A clear screenshot or live URL of your Shopify store homepage
Submit and wait. Approval typically takes one to three working days. Once approved, you get an activation email with your Merchant ID and access to the PhonePe Business Dashboard, where your API credentials are stored. For the Shopify plugin path, you will mostly use your PhonePe login credentials (the email or phone and password you set up), so keep them handy.
Step 3: Log Into Your Shopify Admin
Open your browser and sign in to your Shopify admin panel at yourstore.myshopify.com/admin. Use the account with admin privileges — staff accounts without payment permissions cannot install gateways.
If you manage multiple Shopify stores under one Shopify account, make sure you pick the right store from the top-left dropdown before proceeding. Installing PhonePe on the wrong store is a small mistake but an annoying one to undo.
Step 4: Navigate to Payment Settings
In the Shopify admin, scroll down to the bottom-left corner and click Settings. From the settings menu, choose Payments. This is the central control panel for everything related to how your store accepts money — active gateways, supported payment methods, payout schedules, and manual payment options.
You will see a section called Supported Payment Methods. This is where you add PhonePe.
Step 5: Search and Install the PhonePe Payment Gateway
Click the Add Payment Method button under Supported Payment Methods. Shopify will open a search panel. Click Search by Provider and type PhonePe Payment Gateway in the search bar.
The official PhonePe app will appear in the results. Click Install PhonePe PG. Shopify will show you the permissions the app requires — review them and click Install. The plugin is now added to your Shopify store, but not yet active.
A few things to confirm at this point: the app is published by PhonePe (verify the developer name and ratings), and you are installing it through the official Shopify Payments section, not from a random third-party app in the Shopify App Store. There are unofficial PhonePe integrations floating around — avoid them. They lack support and may stop working when PhonePe updates their API.
Step 6: Authenticate With Your PhonePe Account
After installation, Shopify redirects you to a PhonePe login screen. Enter the registered phone number or email ID you used to create your PhonePe Business account. Submit the OTP sent to your phone or email.
On successful login, PhonePe automatically pulls your Merchant ID, API key, and key index from your PhonePe Business account and configures them inside Shopify. You do not need to copy-paste any credentials manually. Once authentication completes, Shopify redirects you back to the Payments settings page, and PhonePe Payment Gateway is now listed as an available method.
This auto-configuration is the single biggest reason to use the official plugin over a custom API build. No salt keys to copy, no environment variables to set, no risk of credential leaks.
Step 7: Configure PhonePe Settings Inside Shopify
Click on the PhonePe Payment Gateway entry in your Shopify Payments list to open its configuration screen. Here you can:
- Enable or disable Test Mode — keep this ON while you validate the integration; turn it OFF before going live
- Set a minimum order value — useful if you want to restrict PhonePe to orders above a certain amount (some merchants do this to optimize MDR costs)
- Customize the checkout label — what customers see at checkout (default is “PhonePe Payment Gateway”; you can rename it to something shorter like “Pay with PhonePe (UPI, Cards, NetBanking)”)
- Select payment methods to enable or disable — turn off methods like net banking if you only want UPI and cards visible
Save your changes. Do not click Activate yet — first you test.
Step 8: Run Test Transactions
With Test Mode enabled, go to your live Shopify store as a regular customer would. Add a product to cart and proceed to checkout. At the payment step, PhonePe Payment Gateway should now appear as an option. Select it and complete a test payment using PhonePe’s UAT test credentials.
Test these specific scenarios before going live:
- Successful UPI payment use a test UPI handle from PhonePe’s sandbox documentation
- Successful card payment use the test card numbers PhonePe provides
- Failed payment simulate a failure to confirm your store handles it gracefully and the order stays unpaid
- Cancelled payment close the PhonePe checkout midway to confirm the customer returns cleanly to your store
- Mobile checkout repeat the success flow on a phone, since most Indian shoppers buy on mobile
Verify that successful test orders show up in your Shopify Orders dashboard as Paid, and that failed transactions correctly show as Pending or Cancelled. Mismatches here mean the webhook is not firing properly, which you must fix before going live.
Step 9: Activate PhonePe and Go Live
Once all your test transactions pass cleanly, return to the PhonePe configuration screen in Shopify. Turn Test Mode OFF. Click Activate.
PhonePe Payment Gateway is now live on your store. Real customers will see it as a payment option at checkout, and real payments will start flowing to your linked bank account on the standard PhonePe settlement cycle (typically T+1 or T+2).
Run one final live ₹1 test transaction yourself, using a real UPI app or card, to confirm everything works end-to-end in production. Then refund yourself through the Shopify admin or the PhonePe Business dashboard.
Common Issues and How to Fix Them
A few problems come up often enough to call out:

PhonePe does not appear in the search results.
Your Shopify store region might be set to a country other than India. Go to Settings → Store Details and confirm Country/Region is set to India. Without this, Indian payment gateways will not surface.

Test transactions succeed but live transactions fail.
You forgot to disable Test Mode. The credentials and endpoints switch between test and live, so leaving Test Mode on after going live blocks real payments.

Installation completes but PhonePe is not active.
You skipped the Activate button after configuration. Open the gateway settings and click Activate.

Orders show as Paid in PhonePe dashboard but Pending in Shopify.
The webhook is not reaching Shopify. Reinstall the plugin to reset the webhook configuration, or contact PhonePe support.

Customer paid but order not created.
This is almost always a session timeout. The customer's PhonePe payment completed but they took too long, and Shopify dropped the cart. Use the Shopify abandoned checkout recovery flow to follow up.
Best Practices for Shopify Stores Running PhonePe
- Enable UPI as the default payment method. Indian shoppers expect it; making it the visible first option lifts conversion.
- Keep COD alongside PhonePe. Even with UPI dominance, Cash on Delivery still converts a portion of price-sensitive customers. Run them in parallel, not as alternatives.
- Reconcile PhonePe settlements with Shopify orders weekly. PhonePe settles on T+1 or T+2; cross-check that every Shopify Paid order has a matching PhonePe settlement entry. Catches refund mishandling early.
- Monitor your checkout success rate inside the PhonePe dashboard. If UPI success drops below 90%, raise it with PhonePe support. They can route through different acquirer banks to improve odds.
- Pair PhonePe with one international gateway like Stripe or PayPal if you ship outside India. Indian gateways do not handle foreign cards smoothly.
Wrap-Up
PhonePe integration on Shopify is one of the simplest payment gateway setups you will ever do. Sign up for PhonePe Business, complete KYC, install the plugin from Shopify Payments, authenticate, test, and activate. Most of the timeline is KYC approval, not technical work.
The harder part is operational — running test cases across success, failure, and cancelled flows, reconciling settlements, and monitoring checkout success rates over time. Get those right and PhonePe will quietly process a large share of your store’s revenue without you having to think about it.
If you are setting up a new Shopify store for the Indian market and want PhonePe configured alongside Razorpay, Cashfree, or international gateways like Stripe, that is the kind of full-stack payment build we ship at Creative Nexus.
Frequently Asked Questions
How long does PhonePe integration in Shopify take?
The plugin install itself takes 5 to 10 minutes. The full timeline including PhonePe Business signup, KYC verification, and testing is one to three working days, mostly waiting for KYC approval.
Is PhonePe integration in Shopify free?
Installing the plugin is free. PhonePe charges a transaction fee (MDR) on each successful payment. UPI rates are minimal, while card and net banking rates vary. Get the latest rate card from PhonePe Business before activating.
Can I use PhonePe on Shopify without coding?
Yes. The official PhonePe Payment Gateway plugin is fully no-code. Install from Shopify Payments settings, authenticate with your PhonePe credentials, and activate. No developer needed.
Does PhonePe support UPI on Shopify checkout?
Yes. UPI, credit and debit cards, net banking, and wallets are all supported through a single PhonePe checkout. You can enable or disable specific methods from the plugin settings.
What is the difference between Test Mode and Live Mode in PhonePe Shopify?
Test Mode uses sandbox credentials and simulated transactions to validate the integration without moving real money. Live Mode runs real transactions through real bank accounts. Always run a full test cycle before switching to Live.
Can I run discount offers directly through Razorpay?
Yes. The Razorpay Offers feature lets you set up bank-specific discounts, card-type discounts, and minimum order value offers directly in the checkout. The discount applies automatically when the customer pays with a qualifying method, so you do not need to manage coupon codes manually.
Can I integrate PhonePe with Shopify in countries other than India?
PhonePe Payment Gateway is currently available only for Indian businesses with Indian bank accounts and GSTIN. Set your Shopify store country to India to make the plugin available.